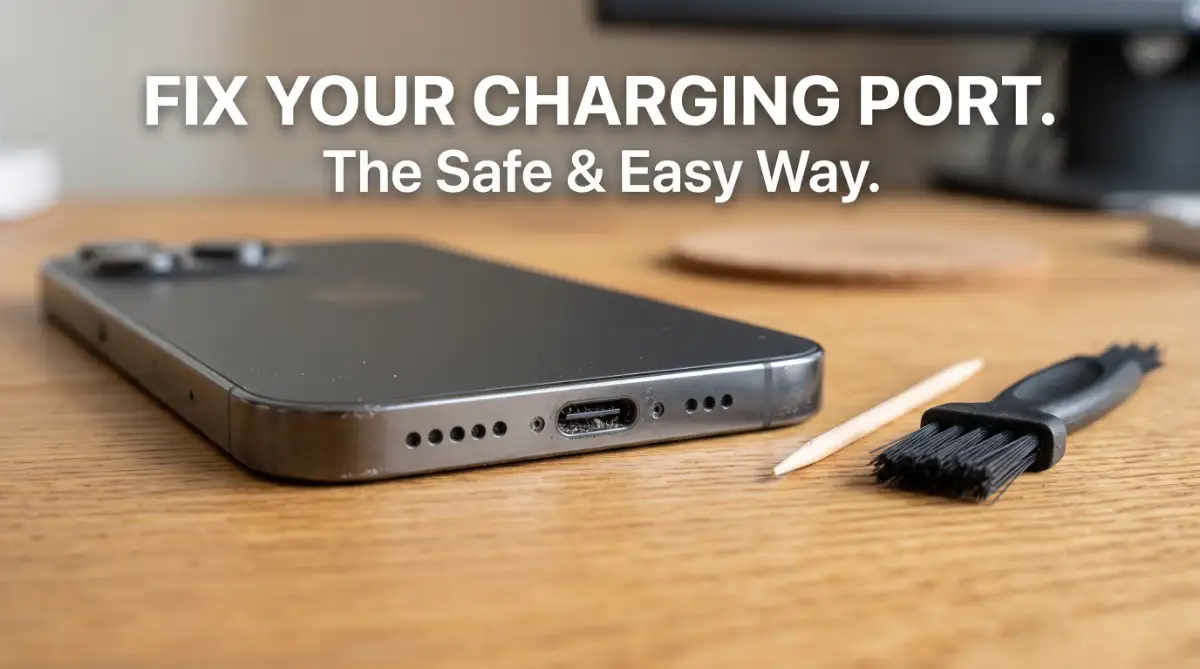
I know that mini-heart attack you feel when you plug in your phone and nothing happens. Before you panic and think about buying a new one or paying for a pricey repair, I have a secret for you.
Most of the time, it's just a tiny bit of pocket lint blocking the connection. I'm going to show you how I fixed mine in five minutes using nothing but a simple toothpick.

Why Most People Make the Problem Worse
When a phone stops charging, many people act out of desperation. They grab the nearest sharp object and start digging around blindly. This is where the real trouble begins.
- Using Metal Objects: People often use sewing needles, safety pins, or paperclips to scrape out dirt. Metal conducts electricity and can short-circuit the sensitive pins inside.
- Blowing with Your Mouth: It seems natural to blow into the port, but your breath contains moisture. This moisture can lead to corrosion over time, killing the port permanently.
- Applying Too Much Force: The internal pins are incredibly thin and fragile. One wrong move with a hard object can snap them off, turning a simple cleaning job into a total hardware failure.
- Using Liquids: Some users try to use water or unapproved cleaning spirits. This almost always triggers the liquid damage sensor and voids your warranty.
Quick Summary: How to Fix Your Charging Port Fast
- Safety First: Always turn off your phone before you start cleaning.
- No Metal: Never use needles or paperclips; they can kill your phone's battery.
- The Best Tool: A simple wooden toothpick or a plastic dental pick is your best friend.
- Be Gentle: Don't scrub; use a gentle "hooking" motion to pull lint out.
- Check the Cable: If cleaning the port doesn't work, your charging cable might be the real problem.
Preparing Your Workspace for a Safe Clean
Before you touch your device, you need to set the stage. Cleaning a port is a delicate surgery for your tech. You cannot do this in a dark room or while you are in a rush.
Find a flat surface with excellent lighting. A desk lamp or a bright window is your best friend here. You need to see exactly what is happening inside that tiny dark hole.
Power Down Your Device First
The first rule of any tech repair is safety. Turn your phone completely off. While we aren't using metal, we want to ensure no electricity is flowing through those pins while we work.
Gather Your Safe Cleaning Kit
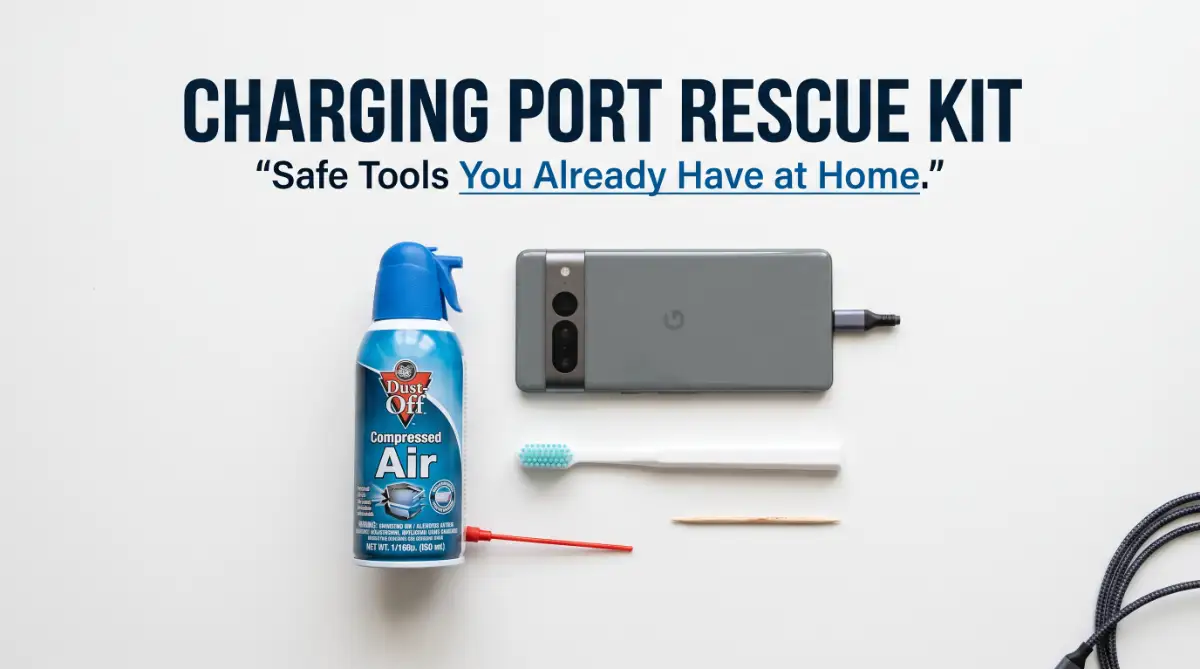
You likely have everything you need in your kitchen or bathroom. Avoid anything made of metal. Stick to these non-conductive items:
- Wooden or Plastic Toothpicks: These are soft enough not to scratch the pins but firm enough to move dirt.
- A Clean, Soft Toothbrush: This is great for flicking out loose debris that the pick uncovers.
- Compressed Air (Optional): If you have a can of air, it can help, but you must use it correctly.
Quick Tool Guide: What to Use vs. What to Avoid
Step 1: The Visual Inspection
Grab a flashlight or use another phone’s LED. Shine the light directly into the port. Tilt the phone at different angles to see the back wall of the port.
You are looking for a "carpet" of compressed lint. This happens when you put your phone in your pocket. Every time you plug in the cable, you pack that lint deeper into the bottom.
If the bottom of the port looks "fuzzy" instead of shiny and metallic, you have found your problem. Don't be surprised if the lint matches the color of your favorite jeans.
Step 2: The Gentle Loosening Method
Hold your phone with the port facing slightly downward. This allows gravity to help you. Take your wooden toothpick and gently insert it into the side of the port.
Pro Tip: If your toothpick is too thick, you can carefully shave the tip with a knife to make it even thinner and flatter.
I used to be really clumsy with this and once tried to use a metal needle to "scrape" the dirt out because it felt stronger. I heard a tiny spark and my heart almost stopped—luckily, I didn't kill the phone, but it taught me to never use metal ever again.
Trust me, using a soft wooden toothpick is the only way to go if you want to avoid a total disaster.
Do not push straight into the center. Instead, hug the walls of the port. Slide the pick along the top and bottom edges.
You want to use a "hooking" motion. Try to get behind the lint and pull it outward. You will be shocked at how much comes out. Sometimes, a piece the size of a grain of rice can be hidden in there.
If you're still a bit nervous about digging into your port, watch this quick video first. It shows exactly how gentle you need to be with your toothpick so you don't break anything! Once you see it in action, you'll feel much more confident finishing the job yourself.
Step 3: Using Air and Brushes Correctly
Once you have loosened the big chunks, it is time to clear the stage. Use your soft-bristled toothbrush to gently scrub the entrance. This removes the "dust bunnies" you just pulled to the surface.
If you are using compressed air, follow the "short burst" rule. Never hold the trigger down for a long time. This can cause freezing liquid to spray out of the can.
Hold the can a few inches away from the port. Use 1-second bursts of air. This should blow out the remaining micro-particles without damaging the internal components.
Understanding the Anatomy of Your Port
To clean effectively, you must understand what you are looking at. Different phones have different port designs.
USB-C Ports (Modern Android and iPhone)
These ports have a "tongue" or a small connector plate right in the middle. The pins are located on both sides of this plate.
When cleaning a USB-C port, you must be extra careful. You need to clean around the center plate. Never try to bend or put pressure on that middle piece, or the port will break.
Lightning Ports (Older iPhones)
The Lightning port is basically a hollow cavern with pins on the bottom (or top). This design is actually easier to clean because there is no center plate.
You can slide your toothpick along the back wall quite easily. Just be careful not to scrape the gold pins on the floor of the port too hard.
Myth vs. Reality: Tech Cleaning Edition
There is a lot of bad advice on the internet. Let's clear up some common myths so you don't ruin your expensive device.
Myth: Using a vacuum cleaner is a great way to suck out dust.
Reality: Vacuum cleaners create static electricity. This static can jump from the nozzle to your phone’s internal boards and fry them instantly.
Myth: Alcohol is the best cleaner for ports.
Reality: While high-percentage Isopropyl alcohol is used by pros, "rubbing alcohol" from the store often contains water. If you use too much, it can seep into the screen or the battery compartment.
Myth: A quick "blow" with your mouth is harmless.
Reality: Human saliva is surprisingly corrosive to electronics. The tiny droplets you can't see will eventually turn the copper pins green (oxidation), which stops charging forever.
How to Prevent Future Build-up
Now that your port is clean and your phone is charging like new, you want to keep it that way. You don't want to repeat this process every month.
Check Your Pockets
It sounds simple, but lint comes from your clothes. Occasionally turn your pockets inside out and lint-roll them. This removes the source of the problem.
Consider a Port Cover
You can buy tiny silicone plugs for a few cents online. These fit into your charging port when you aren't using it. They are perfect for people who work in dusty environments like construction sites or woodshops.
Don't Force the Cable
If you feel resistance when plugging in your charger, stop. Don't push harder. Resistance is a sign that dirt has returned. Pushing harder just "bricks" the dirt into a solid wall.
💡 My Expert Tip for a Perfect Connection
"If you’ve cleaned the port but the cable still feels a bit 'mushy' or loose when you plug it in, check the cable tip itself. Sometimes dirt gets stuck inside the holes of a USB-C or Lightning cable head. Give it a quick brush with a dry toothbrush. A snug 'click' sound is what you want to hear!"
Expert Insight: When Cleaning Isn't Enough
Sometimes, you might clean the port perfectly, and the phone still won't charge. This is when you need to look at other factors.
Check the Cable Ends
Take a look at the "teeth" on your charging cable. Are they black or burnt? Sometimes the cable itself gets dirty or corroded. You can clean the cable contacts with a tiny bit of alcohol and a cloth.
The Battery Age Factor
If your phone is more than three years old, the battery might simply be reaching the end of its life. If your phone charges but loses power very fast, it is a battery issue, not a port issue.
Software Glitches
Occasionally, a phone's software "forgets" how to charge. Try a "Force Restart" while the phone is plugged in. This often resets the charging controller and fixes the issue instantly.
By following these steps, you have saved yourself a lot of money. You have also extended the life of your device. Proper maintenance is the secret to making technology last for years.
Your phone is now ready to handle another day of work, play, and connection. Keep it clean, be gentle, and enjoy that 100% battery icon!
Mastering the Art of Deep Port Maintenance
Cleaning out a few visible dust bunnies is a great start. However, sometimes the blockage is more stubborn than it looks. You might need to use professional-grade techniques to get that "brand new" connection feel.
Using the Right Liquid for Stubborn Grime
If your port feels sticky or has oily residue, dry tools won't be enough. This often happens if you use your phone while cooking or if it sits near a humid area. In these cases, you need a liquid cleaner, but not just any liquid.
You should only ever use 90% or higher Isopropyl alcohol. This specific type of alcohol evaporates almost instantly. It doesn't leave behind a watery film that could cause rust or short circuits.
Take a very thin wooden toothpick and wrap a tiny shred of cotton from a cotton swab around the tip. Dip it into the alcohol, but make sure it isn't dripping wet. Gently wipe the internal walls and the center plate.
This method helps dissolve oils that hold dust in place. It makes the port look shiny and clean again. Just like you would learn how to extend the battery lifespan of a modern laptop, keeping the connection points clean is a form of long-term hardware insurance.
The Precision Paper Method for USB-C Grooves
USB-C ports have a very thin gap between the center "tongue" and the outer shell. Sometimes a toothpick is simply too thick to reach those tight corners. If you feel like there is still dirt inside, try using a piece of stiff paper or cardstock.
Cut a very thin, sharp triangle out of an old business card or a postcard. This paper is thin enough to slide into the narrowest gaps of the port. It is also soft enough that it won't scratch the metal contacts.
Slowly slide the paper tip into the gap and move it in a circular motion. You will often see fine, dark dust sticking to the paper. This is usually "pocket soot"—a mix of fabric fibers and skin oils that turns into a hard paste over time.
Spotting Potential Hardware Damage
While cleaning, you should keep an eye out for permanent damage. Not every charging issue is caused by dirt. Sometimes the physical pins are the problem.
Use your light to look for discoloration. If the pins look green or blue, you have oxidation from moisture. If they look black or charred, there might have been a small electrical surge.
If you see these signs, cleaning might not help much. In those cases, the port might need a professional replacement. Understanding these signs helps you avoid wasting time on a port that is already broken.
This kind of tech awareness is just as important as understanding the impact of keyword research on search engine ranking when you are trying to build something that lasts.
Creating a Long-Term Maintenance Schedule
You wouldn't wait until your car stops moving to change the oil. The same logic applies to your smartphone. A small amount of "preventative care" can save you from a major headache later.
The Monthly Quick-Check
Set a reminder on your calendar to check your port once every month. You don't always need to do a deep clean. Just use a flashlight and look inside.
If you see a tiny bit of lint, flick it out immediately. Don't let it sit there. The more you plug your charger into a dirty port, the more you compress that dirt into a hard "brick" that is difficult to remove.
Choosing Your Environment Wisely
Think about where you store your phone.
Do you put it in a bag full of loose change and old receipts?
Do you keep it in a pocket with fluffy winter gloves?
If you work in a dusty place, like a woodshop or a bakery, your port will fill up fast. You might consider placing your phone in a small protective pouch.
This simple habit keeps the "invisible enemies" of your phone away from the sensitive electronics.
We often talk about how why charging your phone overnight is slowly killing your battery due to heat and chemical stress. Physical port health is the other side of that coin. If the power can't flow cleanly, the battery suffers even more.

Danger Zones: Mistakes That Could Kill Your Device
Even with good intentions, it is very easy to make a mistake that ruins your phone. Many people think they are being helpful, but they end up causing "unfixable" damage.
The Metal Tool Trap
The most common mistake is using a sewing needle or a safety pin. It feels like the perfect tool because it is thin and strong. However, metal is a conductor of electricity.
When you touch two pins at the same time with a metal needle, you create a "bridge." This can blow a fuse on your phone’s motherboard. Even if the phone is off, there is still some residual power in the system. Always stick to wood or plastic.
The Moisture Mistake
Never use "wet wipes" or water. People often think a damp cloth will help clean out the grime. Water is the biggest enemy of your phone’s internal circuits.
Once water enters that port, it can travel deeper into the device. It might trigger the Liquid Contact Indicator (LCI). If this small sticker turns red, most manufacturers will refuse to fix your phone under warranty, even for unrelated issues.
Over-Cleaning and Physical Force
Some people get too aggressive. They scrub the port like they are trying to clean a dirty floor. This is a bad idea.
The pins inside your port are held in place by very tiny solder joints. If you apply too much sideways pressure, you can snap those pins.
Once a pin is bent or snapped, the port is dead. Be as gentle as you would be when cleaning a camera lens.
If you find yourself being too rough with your tech, you might need to take a deep breath. Learning how to stay calm and think clearly under pressure can help you approach these delicate tasks with the right mindset.
The Compressed Air "Freeze"
If you hold a can of compressed air upside down or shake it, it releases a freezing cold liquid. This liquid is actually a refrigerant that can crack the glass or damage the seals of your port.
Always keep the can upright. Use very short, controlled puffs. If you feel the can getting cold in your hand, stop and wait for it to warm up. Long blasts can also push dust deeper into the speakers or the microphone holes.
Using Poor Quality Charging Cables
You might clean the port perfectly, but if you plug in a cheap, $2 cable from a gas station, you are still at risk. Low-quality cables often have "burrs" or sharp edges on the metal tip.
These sharp edges can scratch the pins you just cleaned. Always try to use the original cable that came with your phone or a high-quality "MFi" certified brand.
For more tips on this, check out our guide on how people stop ruining your battery 7 common mistakes when charging devices overnight.
Your Action Plan for a Better Charging Experience
Taking care of your phone doesn't have to be a full-time job. It only takes a few minutes of care to keep your device running smoothly for years.
The Three-Minute Recovery Routine
If your phone starts charging slowly, don't panic. Follow this simple checklist before you think about buying a new one:
- Restart the phone to clear any software bugs.
- Try a different cable and a different power brick.
- Perform the "Safe Clean" with a wooden toothpick as we discussed.
- Check for "Wiggle Room"—if the cable fits tightly but still won't charge, the problem might be internal.
A New Way to Look at Your Tech
Your smartphone is one of the most advanced pieces of technology in your life. It deserves a little bit of respect and maintenance. By taking these steps, you are saving money and reducing electronic waste.
Think of your phone like a high-performance engine. It needs clean "fuel" (electricity) and a clean "intake" (charging port) to function. When you maintain the port, you ensure that the power flows without resistance, which keeps the battery healthy and the phone fast.
Ready to Fix Your Phone?
There is no better time than right now to check your device. Go grab a flashlight and look into that port. If you see some lint, you now have the skills to remove it safely without spending a dime at a repair shop.
You have the tools, you have the knowledge, and you have the plan. Don't let a tiny piece of dust stand between you and a fully charged phone. Go ahead and give your device the care it deserves!

Saving my phone from the "repair graveyard" was such a satisfying feeling, and it saved me a lot of money too. It’s amazing how a five-minute fix can take away all that charging anxiety.
Go grab your toothpick and get started right now—you’ll be so happy when you see that 100% icon pop up again!
Disclaimer: The information provided in this guide is for educational purposes only. While these methods are generally safe, we are not responsible for any damage to your device. If you are unsure or uncomfortable performing these steps, please visit an authorized repair center. Always handle electronics with care and ensure your device is powered off before cleaning.
![The Secret Science of Wireless Charging: Why Cables Are Still Winning [Explained]](https://nexvoramag.com/storage/uploads/blogs/1788067627_the-secret-science-of-wireless-charging-why-cables-are-still-winning-explained.webp)